
Last updated: September 10, 2026
Key Takeaways
- In USDA hardiness zones 7 through 10, many xeric plants stay in place with minimal irrigation once established.
- Install 3 to 4 inches of crushed stone with angular particles, then compact in 2-inch lifts.
- The better choice is 2 to 3 inches of mulch, a firm base, and periodic spot weeding.
- Metal edging buried 2 to 4 inches can flex better than lightweight plastic.
Built right, low-maintenance xeriscape pathways and borders — especially for how to build low-maintenance xeriscape pathways and borders — act like one system: solid base, crisp edge, proper width, and plants that do not bully the path surface. Want a yard that needs a seasonal tidy-up instead of weekly trimming? That is the approach I’d pick.
Who this is for — and who should do something else
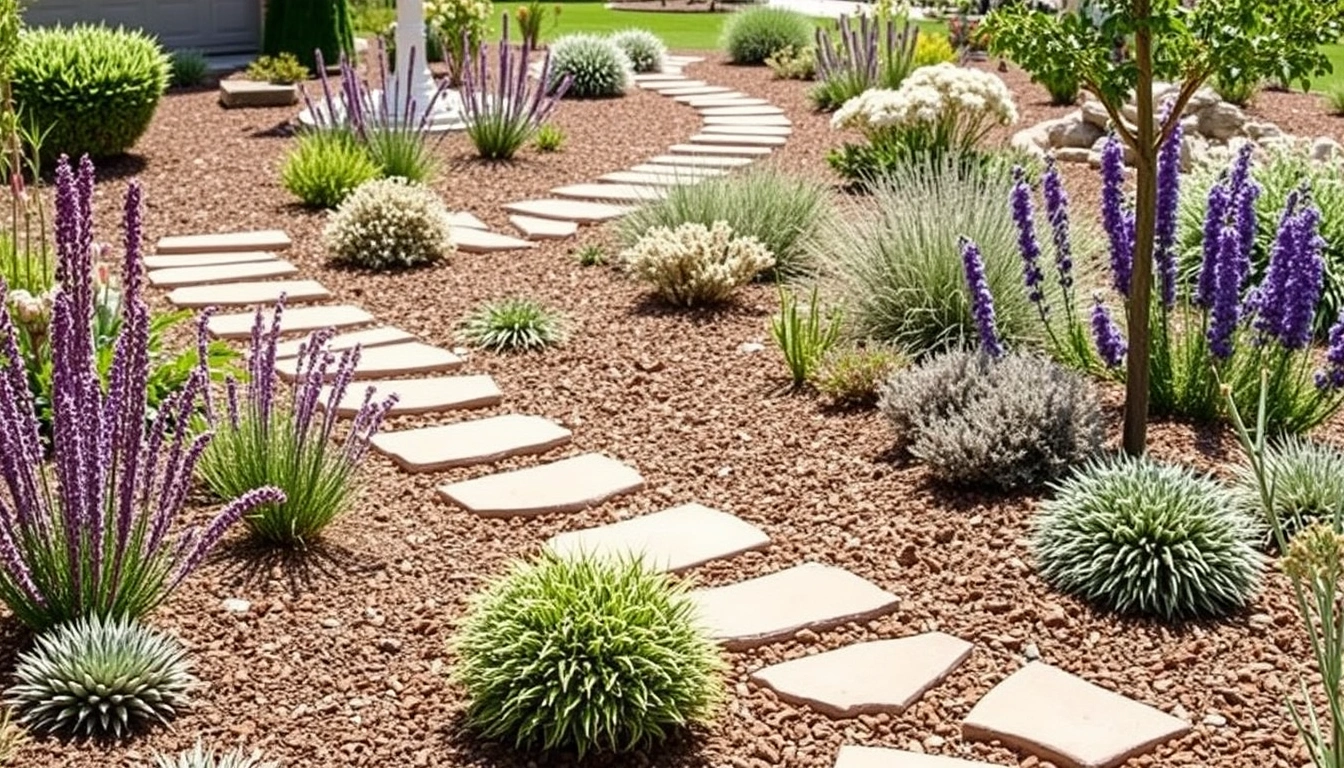
Homeowners and gardeners who want dry-climate or water-conscious planting around a walkway, patio, driveway edge, or front-yard border fit this project, as long as they are willing to do the basic site prep the right way. I’m assuming you already know how to use a shovel, a rake, a level, and a hand tamper, and that you can get common materials like crushed rock, steel or aluminum edging, cardboard, mulch, and drought-tolerant plants.
Good match? Less mowing, less edging, and less irrigation — not a formal garden with clipped perfection. Honestly, if drainage or plant choice feels shaky, call a local extension office or landscape professional before you begin. Six hours of sun a day helps too, along with reasonably good drainage. Xeriscape does not mean “no maintenance”; it shifts the work away from frequent watering and trimming toward occasional weeding, pruning, and topping up material.
Wrong fit? If the area stays soggy after rain, if tree roots are already lifting the soil, or if you want a lawnlike, perfectly level surface with no gravel migration, this approach will frustrate you. It also makes poor sense on very steep slopes over about 10 percent unless you plan terraces, retaining edges, or stepped paths. On those sites, loose gravel can slide downhill and a shallow border can fail. A formal masonry edge or a terraced design may be the better answer.
Climate matters too. In USDA hardiness zones 7 through 10, many xeric plants stay in place with minimal irrigation once established, and the USDA Plant Hardiness Zone Map is the standard reference for checking that fit. Colder zones can still use the hardscape, but freeze-thaw cycles and snow storage make plant choice more important because tender edging or compacted mulch can take a beating. The structure stays; the planting list changes.
What makes a xeriscape path low-maintenance?
Water needs to move away from the walking surface. Weeds should have nowhere easy to root, and the edge has to be strong enough to keep mulch and gravel from wandering off. Usually, the failure starts underground. Not with the plants.
For the surface, you can use decomposed granite, pea gravel, crushed stone, flagstone with joint gravel, or stepping stones set in gravel. Border plantings work best with drought-tolerant shrubs, clumping grasses, succulents, and low groundcovers arranged in repeating drifts. I’d skip aggressive spreaders right beside a path unless you actually enjoy cutting them back every few weeks.
Two terms are worth keeping straight. Xeriscape means landscape design that reduces supplemental irrigation by using climate-appropriate plants, efficient watering, and mulching or mineral covers. Decomposed granite is a compactable granitic material often used for paths; it firms up better than loose pea gravel, but it still needs edging and occasional re-leveling. A weed barrier fabric can block some weeds, but it also gives a false sense of security; dust and windblown debris collect on top, and weeds sprout there anyway.
Really, this is a design question disguised as a maintenance question. If you want a path you only fuss with a few times a year, pick materials that do not drift easily, use edging that reaches 2 to 4 inches above grade, and keep irrigation emitters off the hardscape. A drip line set at the root zone of border plants works better than spray heads that wet the path and feed weeds at the edge.
One blunt truth: no xeriscape border stays “zero weed” forever. The smart design just makes pulling them easy because the soil is shallow and the roots are not tangled through a thick lawn.
How do I build xeriscape pathways that stay put?
Shape the drainage first. Then lock in the base, define the edge, and plant the border so the path never turns into a bed. I would not skip any of those layers, even on a 10-foot garden walk.
- Mark the route and width. Use a hose, marking paint, or a string line to lay out the path at 24 to 36 inches wide for a single-person walk; go 48 inches if two people will pass. Make sure the line matches how people really move. A problem sign is a path that makes users cut corners, which leads to worn edges and bare soil.
- Set the slope before digging. Aim for about 1/4 inch of fall per foot away from buildings or hardscape where water should drain. Check it with a level and string line. A problem sign is any spot where water will pond for more than a few minutes after irrigation or rain.
- Excavate the footprint. Remove 4 to 8 inches of soil for a gravel path, deeper if your soil is soft or you want a more permanent crushed-stone base. For stepping stones, dig each stone pocket so the top finishes flush or 1/2 inch above the surrounding grade. Make sure the bottom stays consistent, not lumpy. A problem sign is exposed organic matter, which will settle and create dips.
- Compact the subgrade. Tamp the exposed soil in 2 passes, wetting lightly if the soil is dusty. Your boot should leave only a shallow impression. A problem sign is a spongy base; that usually means more digging or better drainage is needed.
- Add a base layer. Install 3 to 4 inches of crushed stone with angular particles, then compact in 2-inch lifts. For decomposed granite, use a stabilizing product if you want firmer footing, but keep expectations realistic. The surface should feel firm underfoot. A problem sign is rocking stone or a base that shifts when you press at the edges.
- Install edging. Use steel, aluminum, composite, or masonry edging set so 1 to 2 inches remain above the finished surface and 2 to 4 inches are buried. Follow the line cleanly, without waves. A problem sign is edging that sits flush with grade, because mulch and gravel will escape over it.
- Place the walking surface. Spread 1 to 2 inches of top dressing over the compacted base for gravel, or set stepping stones on a thin leveling bed of sand or stone dust. The surface should be even and not shift when you step on it. A problem sign is loose, ankle-rolling aggregate or stones that wobble.
- Build the border on the outside edge. Keep plants at least 12 to 18 inches from the walking line for shrubs and 6 to 12 inches for low groundcovers, depending on mature spread. Check mature size from the plant tag or a reliable reference, not the nursery display. A problem sign is a plant that will close over the path in one growing season.
- Mulch smartly and irrigate separately. Use 2 to 3 inches of coarse mulch in planting pockets, or mineral mulch where you want the driest look. Put drip emitters under the plant canopy, not on the path edge. Make sure water reaches roots, not gravel. A problem sign is damp stone and algae along the border.
The best result usually looks plain in the good way: the path reads as a clean line, the border plants repeat in groups, and nothing spills where your feet go. If you can stand at one end and spot humps, gaps, or stems crowding the edge, the design still needs another pass.
What plants belong at the edge of a low-maintenance border?
Edge plants should be slow enough, tidy enough, and drought-tolerant enough that they do not demand weekly shearing. I’d go with clumping and mounding plants instead of runners, vines, or anything that sends roots under the path.
Good border plants usually share three traits: mature width under control, low litter, and a root system that tolerates lean soil. In dry, sunny sites, small salvias and lavender can fit the job; rosemary can work in mild climates, sedums and agaves can work where frost allows, yucca suits open spaces, and ornamental grasses are best when they stay in a defined clump rather than reseeding aggressively. For a softer look, many native groundcovers can work if they stay under 12 inches tall and do not creep into the path. The University of California Agriculture and Natural Resources offers plant-selection guidance that helps match species to local water and climate conditions.
Spacing matters more than the plant label. For a border that stays low-maintenance, plant in repeating drifts with enough room for mature spread plus a little air gap. A plant tagged at 18 inches wide should not be spaced every 12 inches if you want to avoid constant trimming. In most cases, I would leave 12 to 24 inches between centers for small shrubs, and more for larger xeric shrubs. Tight spacing looks full at install and messy by year two.
There’s a trade-off here, and it shows up fast. Sparse planting looks unfinished for a while, while dense planting looks polished sooner but creates pruning chores later. If you want the lowest labor, accept the slower fill-in. Use annuals only if you enjoy replanting.
I also prefer fewer species in repeated blocks. Three plants repeated five times usually look calmer and age better than twelve different plants scattered across the bed. That is not just taste; it is maintenance logic. Repetition makes pruning, watering, and replacement simpler.
What are the mistakes people actually make?
The biggest mistakes are predictable, and each one has a cost you can see within one season.
-
Using round pea gravel without strong edging. The stones migrate into the bed and onto the lawn, which means constant cleanup. The better choice is angular crushed stone for stability, or pea gravel only where edging is deep and strong.
-
Skipping base compaction. The path settles, forms ruts, and traps water. The better choice is compacting the subgrade and base in lifts, not dumping all the material at once.
-
Planting too close to the walk. Shrubs and grasses spill into the route, which forces trimming and makes the path feel narrower every month. The better choice is to plan for mature size, not nursery size.
-
Using spray irrigation near the edge. Overspray wets the path, feeds weeds, and stains mineral surfaces with algae or sediment. The better choice is drip irrigation or hand watering at the root zone.
-
Treating weed fabric as the main defense. Weeds germinate in the dust that lands on top, and the fabric complicates future repairs. If you are unsure whether fabric belongs in your site, consult a landscape professional or local extension service before relying on it. The better choice is 2 to 3 inches of mulch, a firm base, and periodic spot weeding.
-
Choosing thirsty, fast-growing ornamentals because they look full at the store. They quickly outgrow the border and require shaping that defeats the “low-maintenance” goal. The better choice is a slower plant that matches the climate and the width of the bed.
A useful rule: if the plant or material needs a correction every month, it probably does not belong in a low-maintenance xeriscape border.
When should I stop and choose a different approach?
You should stop and change the plan when the site conditions make a loose, plant-led xeriscape path the wrong tool.
Water stands in the area after rain or irrigation: The soil is draining poorly — install drainage, raise the path on a berm, or use a hardscape with underdrainage rather than a simple gravel build.
The slope is steep enough that material slides downhill: The grade is beyond what loose gravel can hold — use terraces, steps, or retaining edges instead of a flat run of stone.
Tree roots are close to the surface: Digging may damage roots and the path will heave later — shift the route, bridge over the roots with stepping stones, or use a raised path system.
You need wheelchair or stroller access: Loose aggregate is hard to push through and can drift — use a firmer surface such as concrete, pavers, or stabilized decomposed granite designed for accessibility.
The border gets deep shade and stays damp: Xeric plants will fail or grow thin — choose shade-tolerant, moisture-appropriate plants or redesign the bed for that light level.
You want a perfectly formal look with crisp annual replacement beds: That is not low-maintenance xeriscaping — use a more traditional edged planting scheme and accept the extra labor.
These are not moral failures. They are mismatches. The path system I’m describing depends on stable soil, moderate slope, and plants that can sit quietly in their space. If your site fights those conditions, the right answer is a different structure, not more mulch.
What if my site is rocky, windy, or on a very hot wall?
Change the materials and the spacing, because the standard recipe stops working in edge conditions.
On rocky ground, I would use shallower excavation and more surface-level stepping stones instead of a deep gravel trench. Cutting too deep can create pockets that collect water. On a windy site, choose heavier mulch, larger aggregate, or denser edging; light bark chips and tiny gravel will move. Along a south- or west-facing wall, leave extra room between plants and the hardscape because reflected heat can scorch leaves and dry the soil faster. In that setting, 18 to 24 inches of buffer from the wall is often wiser than tucking plants tight against it.
Clay soil needs more careful grading because it holds water. A 4-inch base of angular crushed stone over compacted subgrade is often better than a thin decorative layer. Sandy soil brings a different issue: settling, so the base may need more depth and stronger edge restraint.
If you live where snow gets stored, don’t place brittle edging where plowed snow will hit it every winter. Metal edging buried 2 to 4 inches can flex better than lightweight plastic. Salt use matters too, so check local guidance before putting sensitive plants near treated pavement. The Colorado State University Extension has useful information on landscape performance in harsh conditions.
How do I keep it attractive with less work over time?
Once the base is in place, the real maintenance is about staying ahead of drift, crowding, and depletion.
Check the edge after heavy rain or wind. If gravel has migrated, rake it back before it turns into a berm in the wrong place. If mulch thins in planting pockets, top it up to the original 2 to 3 inches. If a plant starts to lean into the path, prune it early rather than waiting for a bigger cut later. That is how how to build low-maintenance xeriscape pathways and borders stays low-maintenance after year one.
A seasonal reset is usually enough for a well-built path. Walk the route, lift any exposed edging, spot-remove weeds, and inspect irrigation heads or drip emitters. If the same problem keeps showing up in one spot, the grade, edge, or plant choice is usually to blame.
The easiest way to keep the design calm is to replace weak plants with stronger ones instead of endlessly rescuing the wrong species. In xeriscape borders, replacement is not failure; it is part of the plan. A stronger plant palette and a firmer path structure are what make the whole system work.