Last updated: October 24, 2026
Quick Answer: To protect xeriscape beds near foundations and hardscapes, use an 18 to 24 inch buffer, move roof water away first, and keep plants low and set back.
Key Takeaways
- A narrow bed with a clear edge, a dry band, and plants outside the splash zone is the safest-looking layout.
- Keep water off the foundation with a dry zone, splashback control, and drainage that slopes away from the house.
- Near hardscapes and walls, choose low, controlled plants that tolerate reflected heat and stay off the surface.
- Keep soil, roots, and washout from moving into pavers, edging, or wall drainage zones.
Protecting xeriscape beds near a home foundation, retaining wall, patio, or paver edge means keeping water, roots, and loose stone away from the structure while still using drought-tolerant plants. For How to Protect Xeriscape Beds Near Foundations and Hardscapes, the fix is not “more rock.” It is a clean foundation planting strip, deliberate drainage gaps, and plants that stay low and do not shove against hardscape.
Start with the safest layout for the foundation planting strip in xeriscape beds near hardscapes
The safest layout is a narrow, readable bed with a clear edge, a dry band against the house, and plants kept out of the splash zone. A foundation planting strip is the space between the home foundation and the first planted area, and it should be treated as a buffer, not a place to pack in shrubs; if the site is in doubt, consult a professional. SOURCE: University of California Agriculture and Natural Resources and SOURCE: FEMA.
Before touching the bed, figure out three things: where roof runoff lands, where sprinklers hit, and where hardscape meets soil. If the downspout dumps onto the bed, solve that first with an extension or splash block. If the patio drains toward the wall, fix grading before planting. A pretty planting plan cannot protect a wall that is getting constant water.
A practical starting width is often 18 to 24 inches of open or lightly planted buffer near the structure, but the exact distance depends on the site, the plant mature size, and the builder’s drainage details. If there is a crawlspace vent, exposed stem wall, or old crack you are trying to keep dry, leave more room rather than less.
Once the edge is marked, use this section as the setup, not the finish:
- mark the foundation line
- mark the hardscape edge
- identify low points where water pools after a hose run
- locate existing irrigation heads before planting
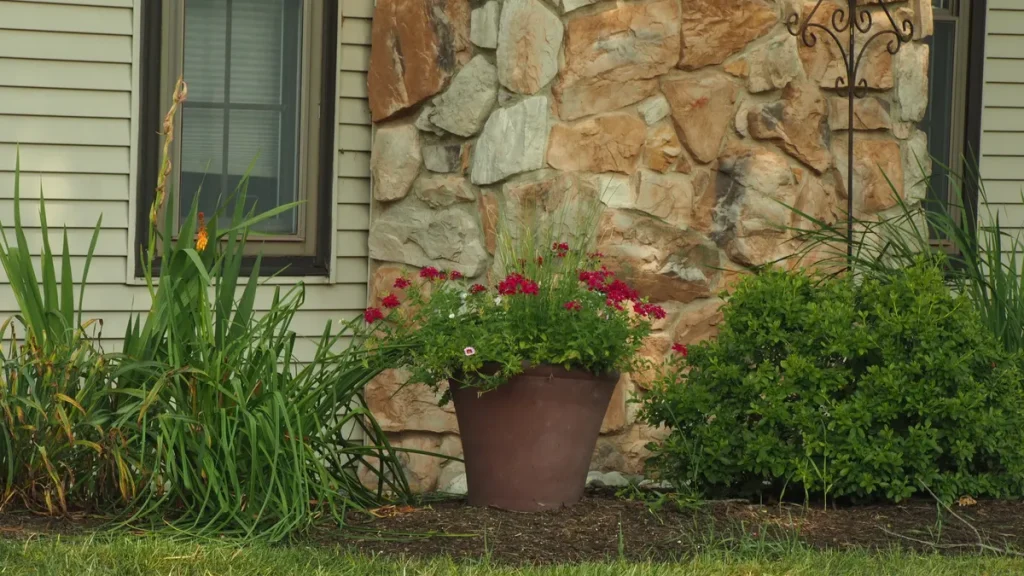
The result you want is simple: a bed that reads as separated from the building, with no mulch piled against siding or stone, and no plant crowns touching masonry.
How do you keep water away from the home foundation?
You keep water away from the home foundation by creating a dry zone, interrupting splashback, and making sure the bed drains away from the structure. If the grade slopes toward the house, plants will not fix it.
Start with runoff control. Downspout extensions, solid drain pipe, or a buried line can move roof water away from the foundation. If the issue is patio runoff, the edge nearest the house may need a slight grade correction or a channel drain. A bed can absorb normal landscape moisture, but it should not serve as the catch basin for every storm.
Next, separate the planting layer from the wall. A 4 to 6 inch strip of drainage gravel or other non-soil material right at the foundation can reduce direct splashback and make inspection easier. That strip is not there to “solve” drainage by itself; it is there to keep wet mulch and soil from sitting against the structure.
If the bed is irrigated, use drip rather than spray near the house. A spray head that wets siding, stucco, or the lower course of masonry is asking for stains and rot. Drip lines or point-source emitters keep water at the root zone and away from hard surfaces. The trade-off is that drip systems need periodic checks for clogging and line damage.
For added protection, slope the bed surface gently away from the wall wherever site conditions allow. Even a subtle fall matters more than decorative rock depth. The goal is to see water move out of the foundation zone during a hose test, not linger in a wet band along the wall.
What plants belong next to hardscapes and walls?
Plants next to hardscapes and walls should stay low, spread in a controlled way, and tolerate reflected heat without flopping onto the surface. Low-growing perennials are usually a better fit than aggressive shrubs or anything that needs constant shearing.
Choose plants with mature heights that stay below the top edge of the wall, curb, or patio seat height. That keeps views open and reduces the need to cut back growth that has already started to interfere with paving. Groundcovers and compact perennials work well when they do not root into joints or spill over where they will trap debris.
Use the plant’s mature spread, not the container size, as the real guide. A 1-gallon plant can become a 3-foot mass if the species wants to sprawl. Leave enough room so the plant does not press hard against pavers or masonry after one season of growth. Crowded plants hold moisture longer and make it harder to inspect edges for settlement or cracking.
Avoid woody plants with strong surface roots right beside pavers, retaining walls, or the house. Roots do not usually “break concrete” overnight, but they can widen joints, lift edging, and make maintenance miserable over time. The safer choice is a root system that stays shallow and fibrous rather than thick and exploratory.
If you want a tidy look, combine two layers only: a narrow gravel or mulch buffer near the hardscape, then a band of low-growing perennials farther out. That keeps the edge readable and reduces the need for constant trimming. The wrong fit is a bed that depends on plants to hide a bad edge; that usually becomes a pruning job every few weeks.
Protecting pavers, edging, and retaining walls from bed failure
Protecting pavers, edging, and retaining walls means keeping soil, roots, and washout from migrating into the joints or behind the wall. When a xeriscape bed fails here, it usually fails at the edge first.
Begin with bed separation. A solid edging system gives the planting bed a fixed boundary and keeps mulch or drainage gravel from spilling into paver joints. Steel, aluminum, concrete curbing, or another rigid edge is often better than a flimsy plastic strip when the bed sits beside a patio or walkway that gets regular traffic.
For pavers, keep the adjacent bed surface slightly lower than the finished paver edge so rain does not wash soil across the joint line. If the bed is flush and loose, every storm moves fines into the gaps. Once that starts, you get weeds, uneven joints, and a cleanup job that never ends.
Against a retaining wall, do not pack the planting soil tight to the wall face. Retaining walls need drainage behind them, and that drainage zone should stay separate from the plant root zone. A wall that is constantly loaded with wet soil and aggressive roots is working harder than it should. The wall detail matters here more than the plant palette.
Use drainage gravel where the wall or hardscape detail calls for it, but do not confuse gravel with drainage by itself. Gravel is useful when it is part of a designed drainage layer or a clean separation band. Piled too high, it can become a heat trap, a weed catcher, and a place where soil slowly migrates.
The result to look for is a crisp edge that still lets water move, with no slumping soil, no spilled mulch, and no pavers rocking when stepped on.
Step-by-step: protect the bed without rebuilding the whole yard
You can protect an existing xeriscape bed in a weekend if the grading is already acceptable and the damage is mostly at the edges. If the foundation is settling or the wall is moving, stop and deal with the structure first.
- Clear the edge to expose the real problem. Pull mulch, loose rock, and overgrown stems back 8 to 12 inches from the foundation, paver edge, or retaining wall. The result should be a visible line where soil, edging, and structure all meet.
- Fix runoff first. Extend downspouts, re-aim irrigation, or redirect water so it no longer dumps against the house or wall. You should see water leave the area in one controlled path instead of spreading across the bed.
- Rebuild the separation band. Install or repair edging, then add a narrow strip of drainage gravel or another non-soil buffer where the design calls for it. Done correctly, the bed edge looks crisp and easy to inspect.
- Reset the planting line. Move plants far enough back that mature growth will not touch siding, masonry, or pavers. After replanting, the bed should read as open near the structure and fuller farther out.
- Mulch lightly, not deeply. Use enough mulch to protect soil, but keep it off the wall and out of joints. You should still be able to see the base of the structure and the edge of the bed.
- Test with a hose for 10 to 15 minutes. Watch where water collects, where it splashes, and whether any soil moves toward the hardscape. If the test leaves the edge intact and the water drains away, the repair is working.
The common mistake here is overcorrecting with more material. A thicker mulch layer, a deeper rock bed, or taller plants can hide the issue for a month and make it worse for a year. The fix is a cleaner edge, not a taller one.
Mulch, rock, and splashback: what actually helps in xeriscape beds near foundations
The right surface treatment helps; the wrong one traps moisture or throws water where it does not belong. Splashback is the issue to watch, not just appearance.
If the bed is next to siding, stucco, or a low stem wall, keep the surface material from piling directly against it. Mulch piled high against a wall absorbs water, stays wet, and can hold moisture against finishes. A thin, even layer that stops short of the structure is safer than a deep mound.
Drains, gravel strips, and edging all work best together. Gravel near the wall can interrupt soil splashback, but only if it stays clean and separated from the planting mix. If soil washes into the gravel, the strip turns into mud with a decorative name.
Rock mulch can be useful in xeriscape beds near hardscape, but it is not a free pass. On south- or west-facing walls, rock can increase heat load and make nearby low-growing perennials struggle. That does not mean never use it; it means place it where reflected heat and glare will not cook the plant crowns.
For mulch depth, keep it moderate and uniform. A bed with a 4-inch pile right at the wall and a bare patch at the edge is asking for splash lines and erosion channels. Even coverage matters more than a big number.
If the bed is under a roof overhang or near a patio where people walk, avoid loose material that migrates with every footstep. Fine bark, shredded mulch, and pea gravel all move if the edge is poorly contained. The best choice is the one that stays where it was placed and does not end up in the drain, on the pavers, or against the foundation.
When not to treat it like a planting problem
You should not treat this like a planting problem when the real issue is structure, drainage failure, or active movement at the wall or foundation. Plants can help only after the hard surfaces are stable.
If you see stepping pavers, a bulging retaining wall, repeated pooling at the foundation, or a crack that keeps changing, the bed is telling you the site needs a repair, not a decorative fix. No drought-tolerant plant will hold back a failing wall or reverse bad grading.
This is also the wrong project for a bed that has no outlet for runoff. A xeriscape bed near a foundation is not meant to store roof water indefinitely. If the area gets flooded every storm, solve the drainage path first and plant later.
The honest trade-off is that a protective layout can look a little more open than a lush ornamental bed. That is the price of access, inspection, and dry structure. A tight, crowded foundation bed may look finished at first and become expensive to maintain within a season.
For bigger drainage or wall questions, the hub on xeriscape roof, wall, and slope protection is the right place to continue. It covers the broader site strategy; this page stays focused on the foundation planting strip and the edges around it.
How far should plants be from a foundation?
Plants should be far enough from a foundation that mature growth does not touch the wall, hide cracks, or keep the base wet. In many yards, that means leaving at least a narrow buffer of 18 to 24 inches before the first planting, with more room for shrubs that spread. The exact distance depends on mature size, irrigation, and site drainage.
What should go next to a retaining wall?
A retaining wall should have a drainage detail first, then a controlled planting zone with roots that will not crowd the wall face. A narrow gravel or separation band often belongs closest to the wall, not a thick soil pile. Low-growing perennials fit better than woody plants that push into joints or make inspection hard.
How do you stop splashback from mulch?
You stop splashback from mulch by keeping the mulch layer even, stopping it short of the wall, and fixing the water source that is throwing droplets onto the bed. A 10 to 15 minute hose test shows whether the problem is runoff, overwatering, or an exposed edge. If water still bounces off hardscape, adjust the grade or irrigation, not just the mulch.
Drafted with AI; not yet reviewed by a person.