Last updated: September 10, 2026
Key Takeaways
- Choose the material by asking what the space must survive for the next 5 to 20 years.
- Organic mulch usually needs topping up about every 1 to 2 years, depending on weather, exposure, and type.
- A common mulch depth is 2 to 3 inches for most beds.
- Overlap seams by at least 12 inches.
Hardscape, mulch, and materials are the three choices that decide whether a yard looks finished, drains correctly, and stays manageable for years. Mud, mowing, and messy edges are the usual failure points. If you are trying to stop mud, reduce mowing, frame planting beds, or build paths and patios that do not fail at the edges, this hardscape, mulch, and materials guide gives you the order of decisions that matters most: what goes where, what each material actually does, and where the trade-offs live.
Who this guide is for, and what it assumes you already know
A homeowner or property manager with a yard problem that sits between “just plant something” and “tear everything out” is the audience here. I’m assuming you already know the basic difference between a patio, a planting bed, and a lawn, and that you can read a tape measure, identify a slope, and tell the difference between sun and shade. Budget matters too — even a rough range — because hardscape, mulch, and materials decisions shift a lot once you are weighing a 20-foot walkway against a 400-square-foot seating area.
Not here, though, if you are planning retaining walls taller than about 4 feet, drainage that handles runoff from a roof or driveway, or any project where excavation may reach utilities. Those jobs can involve geotechnical conditions, code requirements, and structural loads that change the rules fast. A licensed contractor, designer, or engineer may be the right first call when you are adding a wall, stairs, or a paved surface that has to shed water toward a specific outlet. A patio that simply needs to sit level on compacted base is one thing; a wall holding back a slope is another.
I’m also not going to pretend every yard needs the same material. A shaded, root-filled side yard with heavy clay soil wants a different answer than a sunny front foundation bed in sand. Generic advice is where people end up with soggy mulch, heaved pavers, or a yard that looks tidy for one season and chaotic the next.
What matters most? How do you choose the right mix of hardscape, mulch, and base materials so the yard works first and still looks good later? That is the question I’m answering here.
What hardscape, mulch, and materials each do
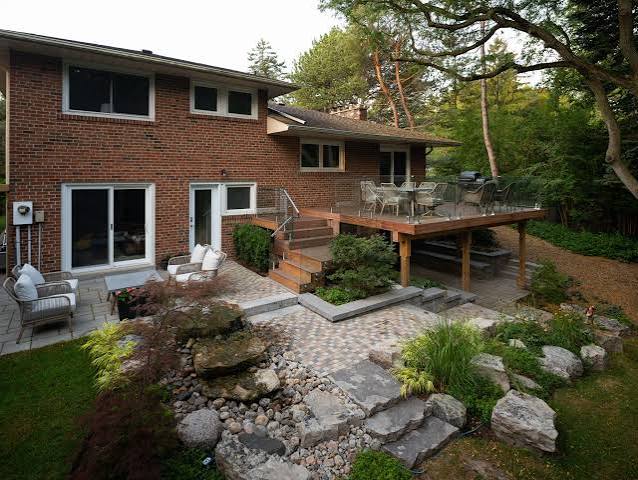
Hardscape is the non-living structure of a landscape: pavers, stone paths, concrete edging, gravel, retaining walls, steps, and patios. Mulch is the top layer over soil in planting beds, usually organic bark, shredded wood, or a mineral cover such as stone. Materials are the underlying and supporting layers: base rock, sand, geotextile fabric, crushed stone, edging, soil amendments, and the aggregate that makes the finished surface stable.
Why split them up? Because each one solves a different problem. Hardscape creates access, shape, and edge control. Mulch suppresses weeds, moderates soil temperature, and reduces splash-back on leaves and stems. Base materials keep surfaces from shifting and keep water moving where you want it. Try to make one material do all three jobs and it usually stumbles. Mulch is not a walkway surface, for example; it breaks down, migrates in rain, and turns soft under foot traffic. Washed gravel can look tidy in a bed, but it does not feed the soil the way organic mulch does.
There is another distinction that gets missed all the time: the visible layer is not the working layer. A paver patio can look simple on top and still need 4 to 8 inches of compacted base below it, plus bedding material and edge restraint. A bed covered with 2 to 3 inches of shredded bark may seem complete, yet it still depends on healthy soil underneath and clear drainage around the root zone. I would treat any landscape job as a system of layers, not as isolated products. For a basic installation overview, the University of Minnesota Extension recommends proper base preparation and layering for pavers and surface materials: https://extension.umn.edu/lawns-and-landscapes/pavers-and-walls.
Think in terms of wear. Walking, turning, pushing a mower, or setting a chair calls for hardscape or compacted aggregate. Soil that needs moisture retention and weed control calls for mulch. Areas that need neither regular traffic nor a structural edge may need only grading and planting. So “hardscape versus mulch” is the wrong frame. The better question is what each zone in the yard needs to resist: impact, erosion, drying, or movement. Simple, but not simplistic.
How do I choose the right material for each part of the yard?
Choose the material by asking what the space must survive for the next 5 to 20 years. A front entry walk, a side yard service path, a planting bed, and a patio edge each have different demands, and the material should answer the demand, not the catalog photo.
Start with the zone’s job. For a walking surface, I prefer pavers, flagstone, poured concrete, or well-graded gravel, depending on the look and the maintenance tolerance. For bed coverage, I usually separate organic mulch from stone mulch. Organic mulch works better where soil health matters and where you want seasonal replenishment. Stone is the better fit where you want low turnover and less blowout in wind. For edge definition, steel edging, aluminum edging, concrete curbing, or set stone creates a cleaner boundary than loose timbers or a line of mulch alone.
Slope comes next. If water naturally runs across the space, a permeable surface or a hardscape layout that allows runoff to escape is better than a sealed flat pad. On slopes, smaller-format pavers and stepped transitions usually behave better than large slabs, because they reduce the chance of rocking. Flat ground has a different headache: settlement. Clay soils and fill can move, so the base needs careful compaction. The EPA’s overview of stormwater basics is a useful reference for why surface runoff and infiltration matter in landscape design: https://www.epa.gov/nps/what-nonpoint-source.
Maintenance changes the answer, too. Organic mulch usually needs topping up about every 1 to 2 years, depending on weather, exposure, and type. Gravel does not decompose, but it migrates and collects leaves. Pavers last well when the base is built correctly, but joints may need refilling and weeds still show up at edges if light and seed find a place. If your goal is the lowest annual labor, I’d usually rank the materials this way: properly built hardscape, then stone or gravel mulch in the right setting, then bark mulch in beds that are easy to refresh.
And plants matter. Shallow-rooted ornamentals usually tolerate mulch well. Plants with crowns that dislike wet bark piled against them need a thinner layer and a cleaner gap at the stem. Trees need a wider mulch ring and no volcano-shaped pile against the trunk. The right material around a plant is not the one that looks deepest; it is the one that leaves the plant’s crown and roots able to breathe.
A practical way to plan the whole yard before buying anything
Plan the yard by measuring zones, not by buying material first. A good material list comes after a rough sketch, a tape measure, and a note on how water moves through the property.
I would start with a simple site map. Mark the house, downspouts, driveway, existing trees, utility boxes, doors, and any low spots that hold water after rain. Measure the longest length and width of each zone in feet. If the area is irregular, break it into rectangles, triangles, or circles and estimate each one separately. For beds, note the average width, because a 2-foot-deep strip and a 6-foot-deep border do not use the same amount of mulch or edging. For a quick quantity check, a 10-by-10-foot bed at 3 inches deep takes about 0.93 cubic yards of mulch.
Then decide where hardscape belongs. Paths should connect the places people already walk. Patios should sit where there is room for furniture and circulation. If a side yard is only used to carry bins, a 36- to 42-inch-wide path may be enough. If two people need to pass, wider is easier. The yard does not need hardscape everywhere it can fit; it needs hardscape where foot traffic is actually concentrated. For small layout checks, a practical rule is to keep main paths at least 3 feet wide and make tighter service paths only when the use is truly light.
After that, decide which areas need mulch and how deep. A common mulch depth is 2 to 3 inches for most beds. Go thinner where small perennials and bulbs are crowded, and thicker only where the bed is broad, woody, and not waterlogged. More than 4 inches starts to create its own problems around stems and roots unless the material is coarse and the planting is established. Stone mulch should be used with even more caution, because it retains heat and can make watering and weeding more awkward. Extension sources such as Penn State recommend keeping mulch pulled back from stems and trunks and using a shallow, even layer: https://extension.psu.edu/mulching-landscapes.
Now choose the supporting materials. A paver patio generally wants compacted crushed stone base, not loose sand on soil. A gravel path often benefits from a geotextile separator and a base layer that locks the surface instead of letting it sink into native soil. Bed edges may need edging that is buried deep enough to resist frost movement or mower damage. If the soil is soft, clay-heavy, or filled with construction debris, I would assume the base needs more care than a glossy product photo suggests.
The last step is sequencing. Heavy hardscape should usually happen before final mulch, because excavation, compaction, and edging will disturb beds. Final mulch goes in near the end, after planting and cleanup, so it does not get mixed with soil or crushed under equipment. Do it out of order and you fix the same area twice. Nobody wants that.
How do I install hardscape and mulch in the right order?
Install hardscape first, build the base correctly, then finish the beds and mulch last. That order keeps material from contaminating the base, prevents rework, and makes it easier to see the site grade while you are still adjusting it. For most hardscape, mulch, and materials projects, this sequence is also the easiest way to keep the finished surface consistent.
- Mark the finished edges and elevations. Grade control starts here, so lay out the project with string line, stakes, marking paint, or a garden hose for curves. Set a reference height at door thresholds, slab edges, or a known low spot, then note the desired slope: a common drainage slope is about 1/4 inch per foot away from structures. Verify that the path or patio will not end higher than a sill, siding line, or step that causes a trip hazard. Looks can lie. If the lines look good but the grade forces water toward the house, the layout is wrong.
- Remove sod, loose soil, and soft spots. Excavate enough to clear organic matter and unstable fill from the footprint. For a paver or stone surface, this often means room for base depth, bedding layer, and finish thickness; exact depth depends on use and soil. Verify that you are down to firm subgrade, not fluffy topsoil. If a shovel sinks easily or the soil smears into a ribbon in wet clay, the base is not ready.
- Install geotextile fabric where separation is needed. Use a woven or nonwoven geotextile to keep base stone from sinking into weak native soil and to reduce mixing between layers. Overlap seams by at least 12 inches. Verify that the fabric lies flat without wrinkles that create soft pockets. If the fabric is bridging a void or bunching at the edge, the base will settle unevenly.
- Build and compact the base in lifts. Place crushed stone or road base in layers no thicker than about 2 to 4 inches before compaction, depending on the compactor and the material. Compact each lift before adding the next. Verify firmness by walking the surface and checking for footprints, rocking, or a hollow sound under a plate compactor. If the surface moves under foot or the stone edges pump up, stop and compact again.
- Set edging and control borders. Install aluminum, steel, concrete, or stone edging before finish material goes in. Anchor it so the top edge is at the correct final height and the body is buried enough to resist migration. Verify that edging follows the line without visible waves. If pavers or gravel can escape the border by hand, the edge restraint is too weak.
- Place the finish surface. Set pavers, flagstone, gravel, or stone mulch to the intended depth and pattern. For pavers, keep joint spacing consistent and check level as you go; for gravel, rake to an even depth and shape the crown or fall so water moves correctly. Verify that chairs, wheels, or foot traffic move smoothly across the surface. If the material rocks, sinks, or leaves exposed low spots, the finish thickness is wrong.
- Install planting, then mulch. Plant shrubs and perennials before the final mulch layer so roots sit at the correct depth. Spread 2 to 3 inches of mulch, keeping it pulled back a few inches from stems and trunks. Verify that plant crowns remain visible and that no mulch touches bark or buried stems. If the mulch forms a mound around the plant, it will hold moisture where you usually do not want it.
- Water, settle, and inspect after the first rain. Lightly water mulch and new plantings, then check the surface after a storm or a full soak. Look for puddles, washed-out mulch, edge migration, or sinking at the base. Verify that water exits the hardscape cleanly and that the bed mulch stays in place. If you see a gutter line cutting through the material or exposed fabric after the first rain, the grading or edge control needs correction.
The point of the sequence is simple: every layer supports the next one. Skip base prep or put mulch in before the hardscape work is done, and the surface may look tidy for a week, but the structure beneath it is already compromised.
When should I stop and choose a different approach?
Stop and change the plan when the material is being asked to solve a structural, drainage, or plant-health problem it cannot solve. That is the mistake that costs the most, because the surface may look finished while the underlying issue gets worse.
Water flows toward the house or a basement wall: this is a drainage problem, not a mulch or paver problem — regrade, add drainage, or redesign the surface so runoff leaves the structure. A patio with beautiful stone but water against the foundation is the wrong project.
The area is on a steep slope, roughly over 15% grade: loose mulch and flat hardscape become unstable fast — use terracing, step systems, or retaining structures designed for the slope. Trying to “hold” the slope with extra mulch only creates washout.
Tree roots dominate the area: excavation can damage roots and create long-term decline — reduce digging depth, use surface materials that sit lightly, or shift the path away from the root zone. If a major root crosses the line of a proposed patio, the design needs to change.
The soil stays wet for days after rain: the subgrade is probably too soft or poorly drained for a standard base — improve drainage, raise the finished grade, or use a different surface plan. If the base stays saturated, pavers settle and mulch turns sour.
You need the surface to carry heavy loads: wheelbarrows are one thing; vehicles, dumpsters, or delivery traffic are another — use a designed slab, thicker base, or engineered pavement section. A decorative gravel path is not a driveway.
The project depends on precise water management: if runoff must be directed to a swale, drain, or dry well, hand-built guesswork is risky — get the drainage layout right before any finish material goes down. The surface is not the place to discover the slope was backward.
The bed is full of shade and persistent fungus issues: thick organic mulch can stay damp too long — use a thinner layer, increase spacing, or choose a drier finish such as coarse stone only where it fits the plants. If the goal is healthy planting, not just a neat border, the material has to match the microclimate.
The mistakes people actually make, and what they cost
The biggest mistakes are not cosmetic; they usually show up as settling, rot, weed growth, or constant maintenance. I’d watch for these six first.
-
Using mulch as if it were a structural surface. The consequence is rutting, washout, and a yard that feels unfinished every time people walk through it. The alternative is to use hardscape, compacted gravel, or stepping stones where traffic is real.
-
Putting mulch too deep, especially against trunks and crowns. The consequence is trapped moisture, bark decay, and plants that slowly weaken even though the bed looks neat. The alternative is 2 to 3 inches of mulch and a clear gap around stems and trunks.
-
Skipping base compaction under pavers or gravel. The consequence is settlement, rocking edges, puddles, and dip lines that catch every rain. The alternative is compacted base in lifts with a separated subgrade when soil is weak.
-
Ignoring the edge restraint. The consequence is material creep: gravel spreads into lawn, pavers drift, and mulch spills into walks after every storm or mow. The alternative is a buried, anchored edge that matches the material weight and traffic.
-
Choosing stone mulch in the wrong bed. The consequence is hotter soil, more glare, and more work when you need to plant, weed, or change irrigation later. The alternative is organic mulch where soil biology and easy replanting matter.
-
Forgetting that hardscape changes water movement. The consequence is runoff pooling at the wrong place or eroding the bed edge. The alternative is to treat every patio, walk, or curb as part of the drainage system and slope it intentionally, or consult a qualified landscape or drainage professional if